Tuesday, August 21, 2012

DIY Bulletin board - a minor tweak

Hello there people! The end of Summer is rapidly approaching and we are trying hard to squeeze our last bit of Summer fun in. I have been doing some projects around the house that I have been avoiding and I want to share one today. Last year, I made a memory board for my kitchen out of a HUGE frame that I found thrifting. I can't find the original post, but here is a pic from last December...

It's hard to tell in this pic, but basically, the frame is backed in fabric and there are a few rows of twine strung across with tiny clothes pins. I liked the look of it, but the twine would fill up pretty fast and I felt like the memory board wasn't living up to it's potential.

I decided that making this a cork board would make the entire space more functional and I can fill the whole space. I don't know about you, but I can NEVER find a cork board or roll of cork big enough for what I need. NEVER. So, this time I opted for cork tiles. The problem with tiles is that they are usually so thin, the push pin doesn't go all the way in. I decided that foam core would be the best thing to back the cork tiles with. Take a look....

First I had to trim the foam core to fit the frame.

The, I put all the cork tiles on there and cut them to fit...

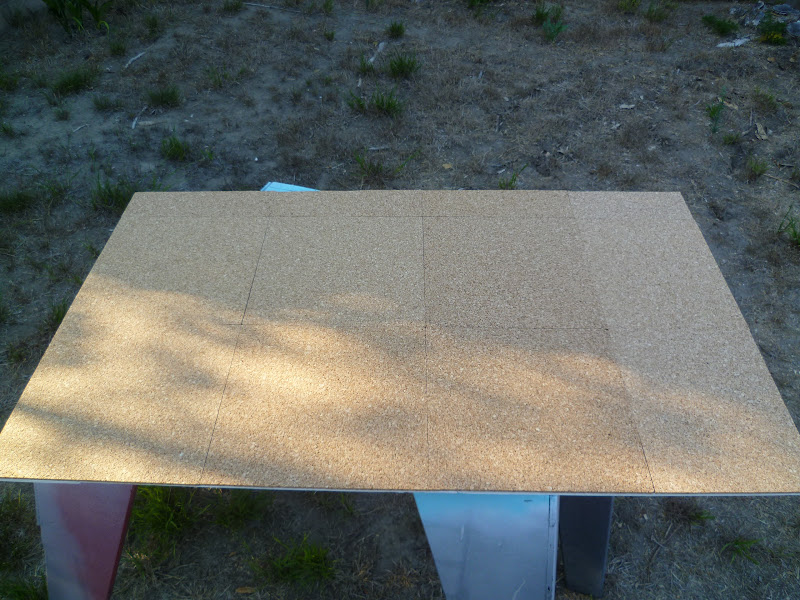
Then I took them outside and spray glued the cork tiles onto the foam core...
This little one kept me company while I worked :)

After that, I used spray glue to attach the fabric to the cork...
I didn't leave enough space when I trimmed my foam core to wrap the fabric around, so I trimmed it to fit exactly.

Next, I popped the whole thing back in the frame and used duct tape to secure the back.

Then.......trouble. When we flipped it over, it started to look all lumpy. This meant that the glue had not dried all the way so the cork was separating from the foam core. So, we applied some weight and let it sit for a couple hours....

After that, everything was dry and we hung it back up :)
Wanna see!!?
Now the entire surface is functional :)


I like it much better now and can't wait to fill 'er up!

Happy (end) of Summer to you!!!

Thursday, August 16, 2012

Mr.Toastee

Happy Thursday Friends. The kiddos and I are headed to the beach today but I had to pop on to tell you what happened yesterday. Ok, here's the back story:

Before Hayden was born, I bought here this ADORABLE little piece of toast on Etsy. Ok, I know you are thinking, what!!? There is this cute Etsy shop called Yummy Pancake and she sells the cutest "crochet type" food items. I thought that it would probably be the cutest thing if my daughter's "security item" was a piece of toast. Haha, too funny!!! She doesn't have a pic of Mr.Toastee on there, but here's her shot of Mrs.Toastee. Isn't she adorable!? Mrs.Toastee didn't exist when I purchased Mr.Toastee, otherwise she would have been my choice.


 Anyway, here is a picture of Hayden with her toastee as a baby...(approximately 11 months old)


Well, as luck would have it, Hayden is a typical kid. She fell in love with a satin blankie and Mr.Toastee never won her heart. But, it has been on her shelf looking cute. Until yesterday.

Do you want to see what I saw when I went into the kitchen yesterday afternoon??? Brace yourself.

DIPPED IN GOOEY CHEESE!!!!!!!! Seriously Hayden!!!?? What the!!?
Haha, luckily he cleaned up ok and now he is safely out of reach. Sheesh! Poor guy!

Just wanted to share my funny story. Happy day to you :)


Thursday, August 9, 2012

Crafting with the Kiddos ROUND TWO

Hello there!!! It is hot and earthquakey here in SoCal but we're surviving ok. The kids....well, they're still driving each other (& me) crazy. Ha! Anyway, I had some crafting to do for my etsy shop so I decided that it may be easier if the kids have a project to work on too. Honestly, I didn't get too much of my own stuff done but it was fun to get crafty with them. Take a look at our supplies....

$1 unfinished wooden birdhouse from Michael's
$.77 craft paint from Michael's
f-r-e-e paint chips from Lowes.


First the kids painted their birdhouses.....
(Needless to say, I'm glad I put the sheet down on the table)

After that, I cut the paint chips into strips...

Then I gave each strip a nice fringe...
Time to attach the "shingles."


Final (messy) step - GLITTER!

I just dabbed on some tacky glue and let them shake on the sparkles...

We dumped off the excess and our houses were done :)

Hayden's:
Noah's:

And here they are hanging from the tree in the backyard waiting for their new tenants :)


I didn't actually put any birdseed in there (or weed seed as my husband calls it) so they are just a cute backyard decoration swaying in the breeze.

Hooray for Summer & getting crafty/MESSY!

Monday, August 6, 2012

Crafting with the kiddos

Happy Moan-day everyone! This is our first Summer week without any scheduled activities. We had 6 straight weeks of Swim Lessons, and Noah did a 3 week Ocean Camp called Sea Cubs. Now, it's time to veg. Haha. I have to admit, "vegging" with my kids these days isn't exactly relaxing. The boy is 6 and the girl is 3 and they are non stop fighting, bickering, and bugging each other (& me). I decided to do an art project with them to keep them busy and keep myself sane. I pinned this pin the other day so I knew what our art day would be...painting. The pin involved finger painting and we were NOT going to do that. Remember, trying to stay sane. haha! Here's what we did...

1.put painters tape on canvas.


2. draw a shape with a sharpie on the tape (Noah chose a star).
3. Use an exacto knife to cut out the shape (Hayden chose a heart). I had flat board-style canvas for this which worked great. I think the exacto could have cut through a gallery wrapped canvas.
4. Start painting.
We painted outside so our mess would be...outside. lol. We did one color at a time letting it dry for 10 minutes between coats. Noah had fun setting the timer for 10 minutes. I worked on my own crafts and they rode bikes in the yard until it beeped.

(note: The next time we do this, I will only be putting out the colors that I want them to use. They have pretty interesting color combo taste). The peach was not in my original plan.


After all the paint was on, we set the timer for 20 minutes so it could get really dry. Being outside helped with quick dry time and craft paint typically dries fast.
We could have stopped there if we wanted to and just pulled off the tape, but we took it a step further. After it was completely dry, I taped off some stripes and let them fill it in with white (perhaps toning down the funky color scheme a bit).

After that was done, we peeled off the tape and let it dry. Then I let them each pick out a color to fill in their shape. I did this part because...well...precision isn't in the cards for them quite yet ;)

Here are their finished products:

Hayden:

Noah:
My kids absolutely love how they turned out and I think they're pretty cute too! Noah said we should send them to a museum (lol).

My second to last step was to add a D-hook using my glue gun.


Wanna see where they ended up??


Check!!!

Crafting with the kiddos was a great Summer activity and gave us a few much needed fight-free minutes {sigh}.

Happy Summer everyone :)