Showing posts with label Organizing. Show all posts

Monday, September 24, 2012

Outside the box: Rotating photo display

Happy Monday everyone! I hope you had a nice weekend :) Thanks for all the painted pumpkin suggestions from my last post. I'm giving it some careful thought and will reveal my decision soon. Today I have a bit of a funky diy for you. A bit quirky and outside the box. Some may hate this (be kind) and some may love it. I absolutely LOVE this and have been wanting one for a long long time.

Backstory:
I saw this in the potterybarn catalogue a few years ago and was in love!! I wasn't in love with the $129 price tag though, and also didn't have the space in my tiny starter condo.
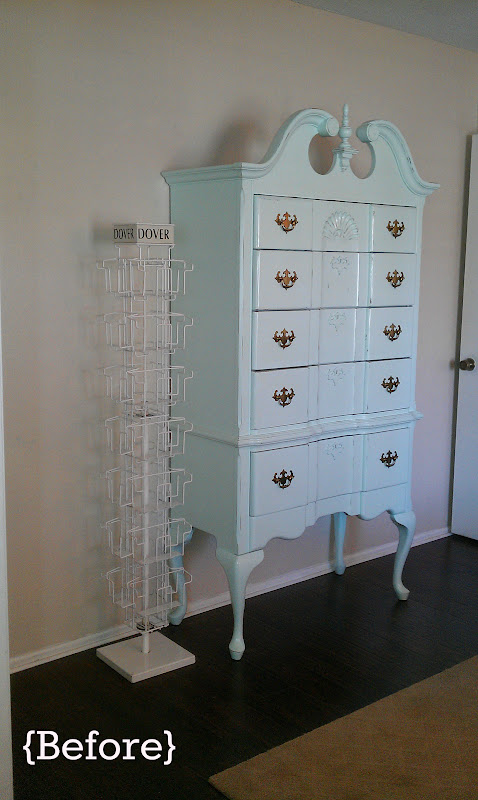
Fast forward to this past Friday while I was helping my mom work in the UNICEF store that she volunteers in and BAM!
This came home with me :)
They weren't using it in the shop anymore and it was just sitting in the back. YAY! Now, I know it's not as streamlined or elegant looking as the PB one, but f-r-e-e- is definitely the price for me!

Ready to see the after!!?

Gold goldy gold!!!!! Woohoooooo!!! Wanna see her closer up??!

(Sorry for the glare on the photos, it's a bright sunny day here in SoCal)

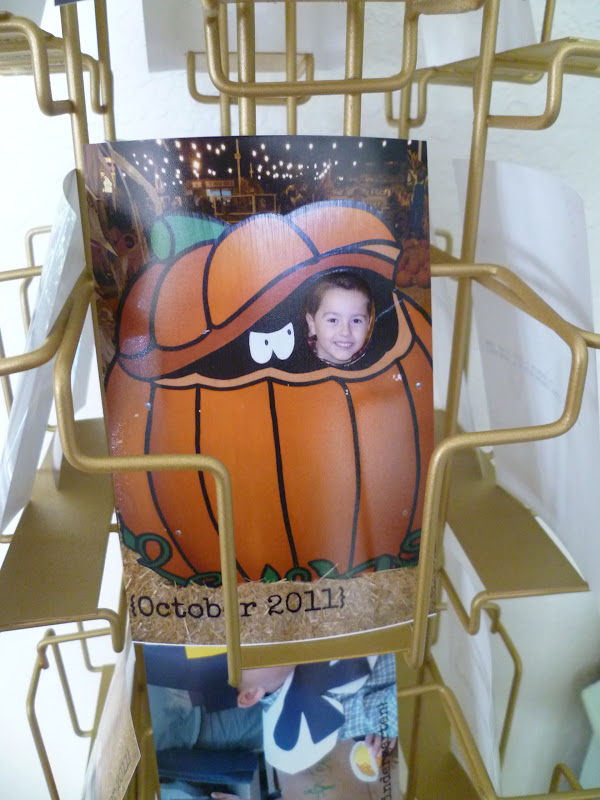
All I did was give her a good cleaning, and spray her with a matte gold spray paint (2 cans worth).

I had some fun in pic monkey adding dates and texts to some family photos. I also made sure to print them in "lustre" vs "glossy" so there wouldn't be so many finger prints.

My kids are having a blast spinning it around and looking through the photos. Heck, I am too!
Look at this one from last Halloween at Disneyland (notice Noah's face and Hayden's thoughts about it). Funny!

Haha!!!

So, what do ya think!!? Am I crazy!? are you clicking "unsubscribe" as we speak??!


Looooooooooooooooooooooove it!!! Lol! I know, I know. Crazy ;)
Have a wonderful week people!!!


Friday, April 13, 2012

Girly tid-bits

It is the last stretch of Spring break and it is a rainy mess outside. A perfect wet and gloomy day to stay in and get cozy. Who is the bonehead that takes her squirly kids out on errands in this weather you ask!? ME! Ha ha! Ugh! Not my very best idea, but I couldn't imagine an entire day stuck indoors with them. The silly squirrels get squirly for sure! ha ha!

Anyway, in wrapping up Hayden's room-refresh, I thought I would talk about the other details of her room. Some stayed the same, a few changed, and all in all it was a successful refresh :)

FIRST - you must take a look at the "before" pics so that you can clearly see why a refresh was in order. Take a look (& try not to cry when you see the m-e-s-s).

1. Dresser/changing table (sorry about the icky cell phone pic)


2. bed along the window making the curtains impossible to open and close easily. MESS!
3. Closet of doom. Look at that mess! The house shaped toy shelf is jammed with those creepy babies and animals. ha ha. Ewe!
(this above picture literally gives me hives)

Now let's get to some refreshed "after" shots, k!? Phew! that was rough.
We are currently in potty training mode over here so I thought it was an ok time to ditch the changing pad on the dresser. I definitely wanted to add more play space on the floor for playing and I felt like eliminating the giant yellow dresser from the room would be a good idea. However, it was painted especially for her by yours truly, and we really need the clothes storage. Like, really!!! She's quite the fashionista :)
So..........

It ended up here. The top of the dresser is still in progress, but you get the gist. Ideally I would like to ony have the laundry basket live up there and everything else be cleared. Ideally. Right now it holds storage bins, rain boots, etc.

Oh - and here's a shot of her magnet board wall that is still in full effect. It's a bit messy looking, but she loves it so it stays. Plus, spackle is not my friend and there are a ton of holes under there. ha ha!

The next big change that occurred was the bed moved away from the windows to the other wall. I can not tell you how much better it is to have the curtains more easily accessible.

I had totally forgotten that I had this adorable vintagey looking twin sized chenille quilt in the linen closet. I purchased it loooong ago from Ross for $9.99. I had no real plan for it, but I loved it and it had to be mine. Here's a close-up for you...
Just look at those cute dots and pom pom trim. {LOVE}.

Of course the bird-a-lier stayed put and is still one of my favorite projects to date :)

Since the yellow dresser moved into the closet, the dollhouse shelves needed to be moved out. Take a look:
It's definitely much easier to maneuver the curtains behind the shelves. MUCH easier. I didn't get a great pic of the wall with the windows unfortunately and am too lazy busy to take one at the moment.

The last part of the switch-eroo was to put her little bookcase on the wall where the dresser was. It's much smaller in scale and doesn't make this side of the room feel so heavy. Plus, my girl loves her books :)

(note: I plan to get rid of that ugly lamp asap. I want to find a cute lamp to go on top of the white cabinet on the left side)

All in all, while I didn't actually add to the square footage of floor play space, the layout is much more open and airy feeling and I think everything turned out great. Hayden loves her "new" room and that is really all that matters in the end.

I hope you are having a safe, warm, and happy Friday! Please cross your fingers for me that the flea market on Sunday doesn't get rained out. I am dying to get my thrift on ;)


Original project post links:
Dresser
Bookcase
Magnet board wall
Bird-a-lier


Tuesday, April 10, 2012

Making some progress

Happy Tuesday everyone! I hope you all had a great Easter weekend, I know I did! We are on Spring Break over here so along with doing fun stuff, I am trying...trying to get some things accomplished. I previously mentioned that I am trying to whip Hayden's room into shape. Just a bit of reorganizing and making things look pretty :) I rearranged the furniture in there a bit but will wait until the room is done to show you before/after pictures. Today I was able to check 2 things off of my looooong list, yay!
Here is a before pic of Hayden's cute little cabinet. It is a great size for her room, and the doors are made of plexi-glass so there is no risk of them breaking if (when) a toy goes flying across the room.
 I really do love the idea of doors you can see through, but let's face it people. Mass quantities of stuffed animals and creepy looking baby dolls are just NOT cute. Individually, yes, they can be cute. But this just looks like a jumble of junk and that is definitely not helping her room look "clean" and "pretty," which is the goal.

I toyed with idea of using some of my vintage sheet fabric that I used on these wall hangings, but changed my mind in fear of it all feeling too matchy matchy (I'm not a fan of matchy matchy). So, while at walmart the other day, I picked up 1.5 yards of this cute floral fabric that sort of had a vintage look to it (and, at $1.50 per yard, it was a steal)!

Here's a close-up shot of the fabric....(in person it is even cuter).

And here's the big picture for you :)
Since the print on the fabric is so small, you can't really see it in the far away shot. Oh, and it sort of does bug me a little bit that you can see the white shelves through the fabric (but definitely not enough to do anything about it - ha ha, L-A-Z-Y).

It definitely has a much more clean look to it now and the animals and creepy babies are no longer staring at us :)

I like the way it came out, and it was such an easy fix. A bit of hot glue along the edges of the doors and poof! Magic! Clean & pretty! Oh, and, the fabric will be easy to switch out down the road when she is an angry teenager and wants everything black. NOT looking forward to the teen years people! Ha ha!

Do you like it or are you clicking the "un-follow" button as we speak? ha ha!! I like it :)

The second thing I tackled today was turning this eye sore:

Into this....
Oooooh, ahhhhhhh. Life changing I tell you! Ha ha, no kidding. Shoes have been a thorn in my side around here for pretty much ever. They are always ALL over the place. Not anymore, no way! Take that shoes!! BAM!! Ha ha, ok - I've officially lost it.
I hope to be back soon with more :)

Bye!

Friday, January 13, 2012

...check!!

First day back at the gym in the new year was yesterday - check!
Ate healthy ALL day today - check!!
Organized Noah's room - check!! YAY!!!!!
This whole "back to the grind" thing is pretty cool :)

Our house is not "done" by any means. There are a zillion things that need to be done. The 5 year plan involves a new kitchen, back yard, bathroom makeovers etc. But, in the meantime, I would love it if each room looked at least halfway decent. Ha ha! Not too much to ask, right?! For the most part, most of the rooms in our house are pretty "ok" looking. Some are better than others for sure, but you can pretty much tell that someone loves and cares about the way this house looks & feels (that's me if you didn't catch that). Anyway, Noah's room was the last room that was.....well.......neglected. Here's a pic (& when I say neglected, I don't mean messy....it's pretty much always gonna be messy, ha ha).

BEFORE: (ick)
The hand-me-down furniture (which we so appreciate btw) gave it sort of a "yard sale" look. Not so chic.
Nothing really "fit," it was all unorganized, and just plain icky. I convinced Josh that this room needed immediate attention. Although his general opinion is that a boy's room should be functional, not necessarily stylish. Nope. Disagree.

Poof!!! Gone!!!
We dragged the tall one out to the curb and within minutes it had found a new home (& my mom is going to use the dark one at her house).

Um...Ick!
Ha ha!! What now!? Well, I'll show you :)

Ta-daa!!!!! Ikea saved the day!! YAY!!!
The "expedit" shelving unit from Ikea (starting to wonder if I will ever not have Ikea furniture in my house - ha ha). The 4x4 cube shelving unit (in new lacquer white finish) was $149 and the 4 black bins on the bottom row were an additional $4.99 each. Not super duper cheap all together, but considering how much bigger it makes the itty bitty room feel, I think it was well worth it!

And now I have an awesome display space for our globe collection :)
Ultimately I would like to do some sort of wall treatment like stripes or something, but that will happen later. I also want to give him new bedding and curtains....I want kind of a red/white/blue type feel to go with the maps and globes. If you can't already tell, I like a mis-matched eclectic "collected" look :)
Oooh, and I found these awesome union jack pillows at goodwill for $2.99 each - score!
I'm so happy that my little boy's room is on it's way to being a clean and more functional space.
Check!!! Ha ha, I love the way that sounds :)
Happy Friday the 13th everyone!!

Wednesday, February 16, 2011

The BIG reveal!!!

Psyche! Ha ha! Did I sucker you in with that title?! This reveal is anything but BIG, but hey, at least my crafty juices are flowin' a little. Since you're already here, you may as well keep reading! I got these pails for $2.50 each at Target. Loved the color, but they needed some pizazz.
I used some blue painters tape to make some rectangles (ooooooh, ahhhhhhhhhh).
I found this little bottle of chalkboard paint in the craft section at WalMart. So handy!

I also wanted to paint a heart chalkboard on the jar that we use for our loose change. To be honest, it wasn't coating well at first and I was worried that this project was a bust.

It took like a zillion coats (ok, maybe like 5). It was worth it though because now I have awesome chalkboard labels (again. oooooooh ahhhhhhhhh). We recently (yesterday) inherited an unwanted bookcase from my sis in law and decided to add it to the "garage sale ensemble" that we have going on in Noah's room. Nothing matches (finish or scale), but at this point, it's all about storage. We got rid of his huge toy chest that was like the Bermuda triangle for toys and have a much better system now. Like I said, it's totally mis-matchy, but it works (& let's be honest, do boys really care??)
This is an attempt to corral some of the boy clutter. This may not last long though, after I took the picture, we found like 10 more balls that need to go in there. But, the joy of chalkboard labels is that you can erase!

And here are all of our nickels, dimes, and pennies. When the jar fills up, we'll take it to the bank (or the coinstar machine in WalMart.....way too lazy to roll coins. WAY).
Ok. That's it for today. It's all I can muster. Ha ha. Now for some snacks and tv while the little ones nap. Even in a crafty slump, life is sweet!!!